安装 FreshRSS 指南 | 使用 Lnmp 一键脚本配置环境 | Debian
2023-1-25|2024-11-25
D_SUPER
type
Post
status
Published
date
Jan 25, 2023
slug
freshrss_installation
summary
在 lnmp 环境下安装 FreshRSS 软件,开启自订阅 RSS 旅程。安装要点如下:1. 删除 lnmp 的防跨目录设置;2. 增加 nginx 的 location 设置;3. 取消 php 禁用的函数
openlog 和 syslog ;4. 补充缺少的 php 模块等。category
技术分享
tags
建站
RSS
LNMP
好用软件
icon
LNMP 是指一组通常一起使用来运行动态网站或者服务器的自由软件名称首字母缩写,Linux系统下Nginx+MySQL+PHP 这种网站服务器架构。开源免费的 FreshRSS 在此环境下安装,可以实现订阅 RSS 功能。
RSS 订阅有很强的应用场景:比如我们经常时常访问的博客、需要关注的 Shopify 店铺等等都可以采用RSS 来获取最新动态,节约逐个访问的时间。FreshRSS 可以在 IOS 上使用 Reeder 订阅,十分方便。
本文介绍使用 lnmp.org 配置环境下的,最新版 FreshRSS 安装教程。
前置操作
LNMP 环境配置
- 使用 lnmp.org 一键配置环境
cd /root
wget http://soft.vpser.net/lnmp/lnmp1.9.tar.gz -cO lnmp1.9.tar.gz && tar zxf lnmp1.9.tar.gz && cd lnmp1.9 && ./install.sh lnmp
其中选择安装最新的 Nginx, mysql 和 PHP 即可。
域名解析
- 将 cloudflare.com 托管的域名(例如:
freshrss.dsuper.xyz) A 记录指向 VPS IPv4 (或 AAAA 记录指向 VPS 的 IPv6)
安装 FreshRSS 文件
下载和解压 FreshRSS 最新版
- 创建并进入文件夹 ,下载和解压压缩包 [查找最新版本链接]
mkdir /home/wwwroot/freshrss.dsuper.xyz
cd /home/wwwroot/freshrss.dsuper.xyz
wget https://github.com/FreshRSS/FreshRSS/archive/refs/tags/1.20.2.tar.gz
tar -zxvf 1.20.2.tar.gz
复制文件到根目录并修改权限
cp -R FreshRSS-1.20.2/* .
chown -R www:www . && chmod -R g+r . && chmod -R g+w ./data/
rm -f master.zip
rm -rf FreshRSS-1.20.2/
配置 Nginx
- 添加 vhost:
lnmp vhost add
- 输入域名:
freshrss.dsuper.xyz
* Please enter domain(example: www.lnmp.org): freshrss.dsuper.xyz
Your domain: freshrss.dsuper.xyz

* Enter more domain name(example: lnmp.org sub.lnmp.org):
domain list: freshrss.dsuper.xyz
- 设置网站根目录:
/home/wwwroot/freshrss.dsuper.xyz/p
* Please enter the directory for the domain: freshrss.dsuper.xyz
Default directory: /home/wwwroot/freshrss.dsuper.xyz: /home/wwwroot/freshrss.dsuper.xyz/p

Virtual Host Directory: /home/wwwroot/freshrss.dsuper.xyz/p
- 其他设置(注意设置数据库)
* Allow Rewrite rule? (y/n) n
You choose rewrite: none

* Enable PHP Pathinfo? (y/n) y
Enable pathinfo.

* Allow access log? (y/n) y
Enter access log filename(Default:freshrss.dsuper.xyz.log):
You access log filename: freshrss.dsuper.xyz.log

* Enable IPv6? (y/n) y
Enabled IPv6 Support in current Virtualhost.

* Create database and MySQL user with same name (y/n) y
!!设置的用户名和密码记录下来,填在后续FreshRSS的网页安装的相应部分。

* Add SSL Certificate (y/n) y
1: Use your own SSL Certificate and Key
2: Use Let's Encrypt to create SSL Certificate and Key
3: Use BuyPass to create SSL Certificate and Key
4: Use ZeroSSL to create SSL Certificate and Key
Enter 1, 2, 3 or 4: 2

* Using 301 to Redirect HTTP to HTTPS? (y/n) y
Redirect http://freshrss.dsuper.xyz to https://freshrss.dsuper.xyz

Press any key to start create virtul host...
- 打开
/usr/local/nginx/conf/freshrss.dsuper.xyz.conf,在 server 443 段内,include enable-php-pathinfo.conf;后添加:
location / {
	try_files $uri $uri/ index.php;
}
删除防跨目录设置
- 进入 lnmp 文件夹:
/root/lnmp1.9/tools
- 运行:
./remove_open_basedir_restriction.sh
- 填入目录:
/home/wwwroot/freshrss.dsuper.xyz/p
- 重启 Nginx:
lnmp nginx restart
解除 PHP 禁用函数
- 修改文件
/usr/local/php/etc/php.ini323 行,删除函数禁用中的openlog和syslog。
- 重启 php-fpm:
lnmp php-fpm restart
至此,可以通过域名访问 FreshRSS 安装页面,其中数据库部分填入先前 mysql 的相关信息。
要想 FreshRSS 正常运行还需要补充 PHP 库,设置自动刷新。
- FreshRSS 要求模块: [*]

其他
检查已安装 PHP 模块
/usr/local/php/bin/php -m返回全部已启用的 php 模块
安装 PHP 缺少的模块 - Fileinfo
如果大于 1GB 内存 lnmp1.9 会自动安装 Fileinfo 模块,KVM 架构初始内存不足可以尝试设置 SWAP
- 进入文件夹:
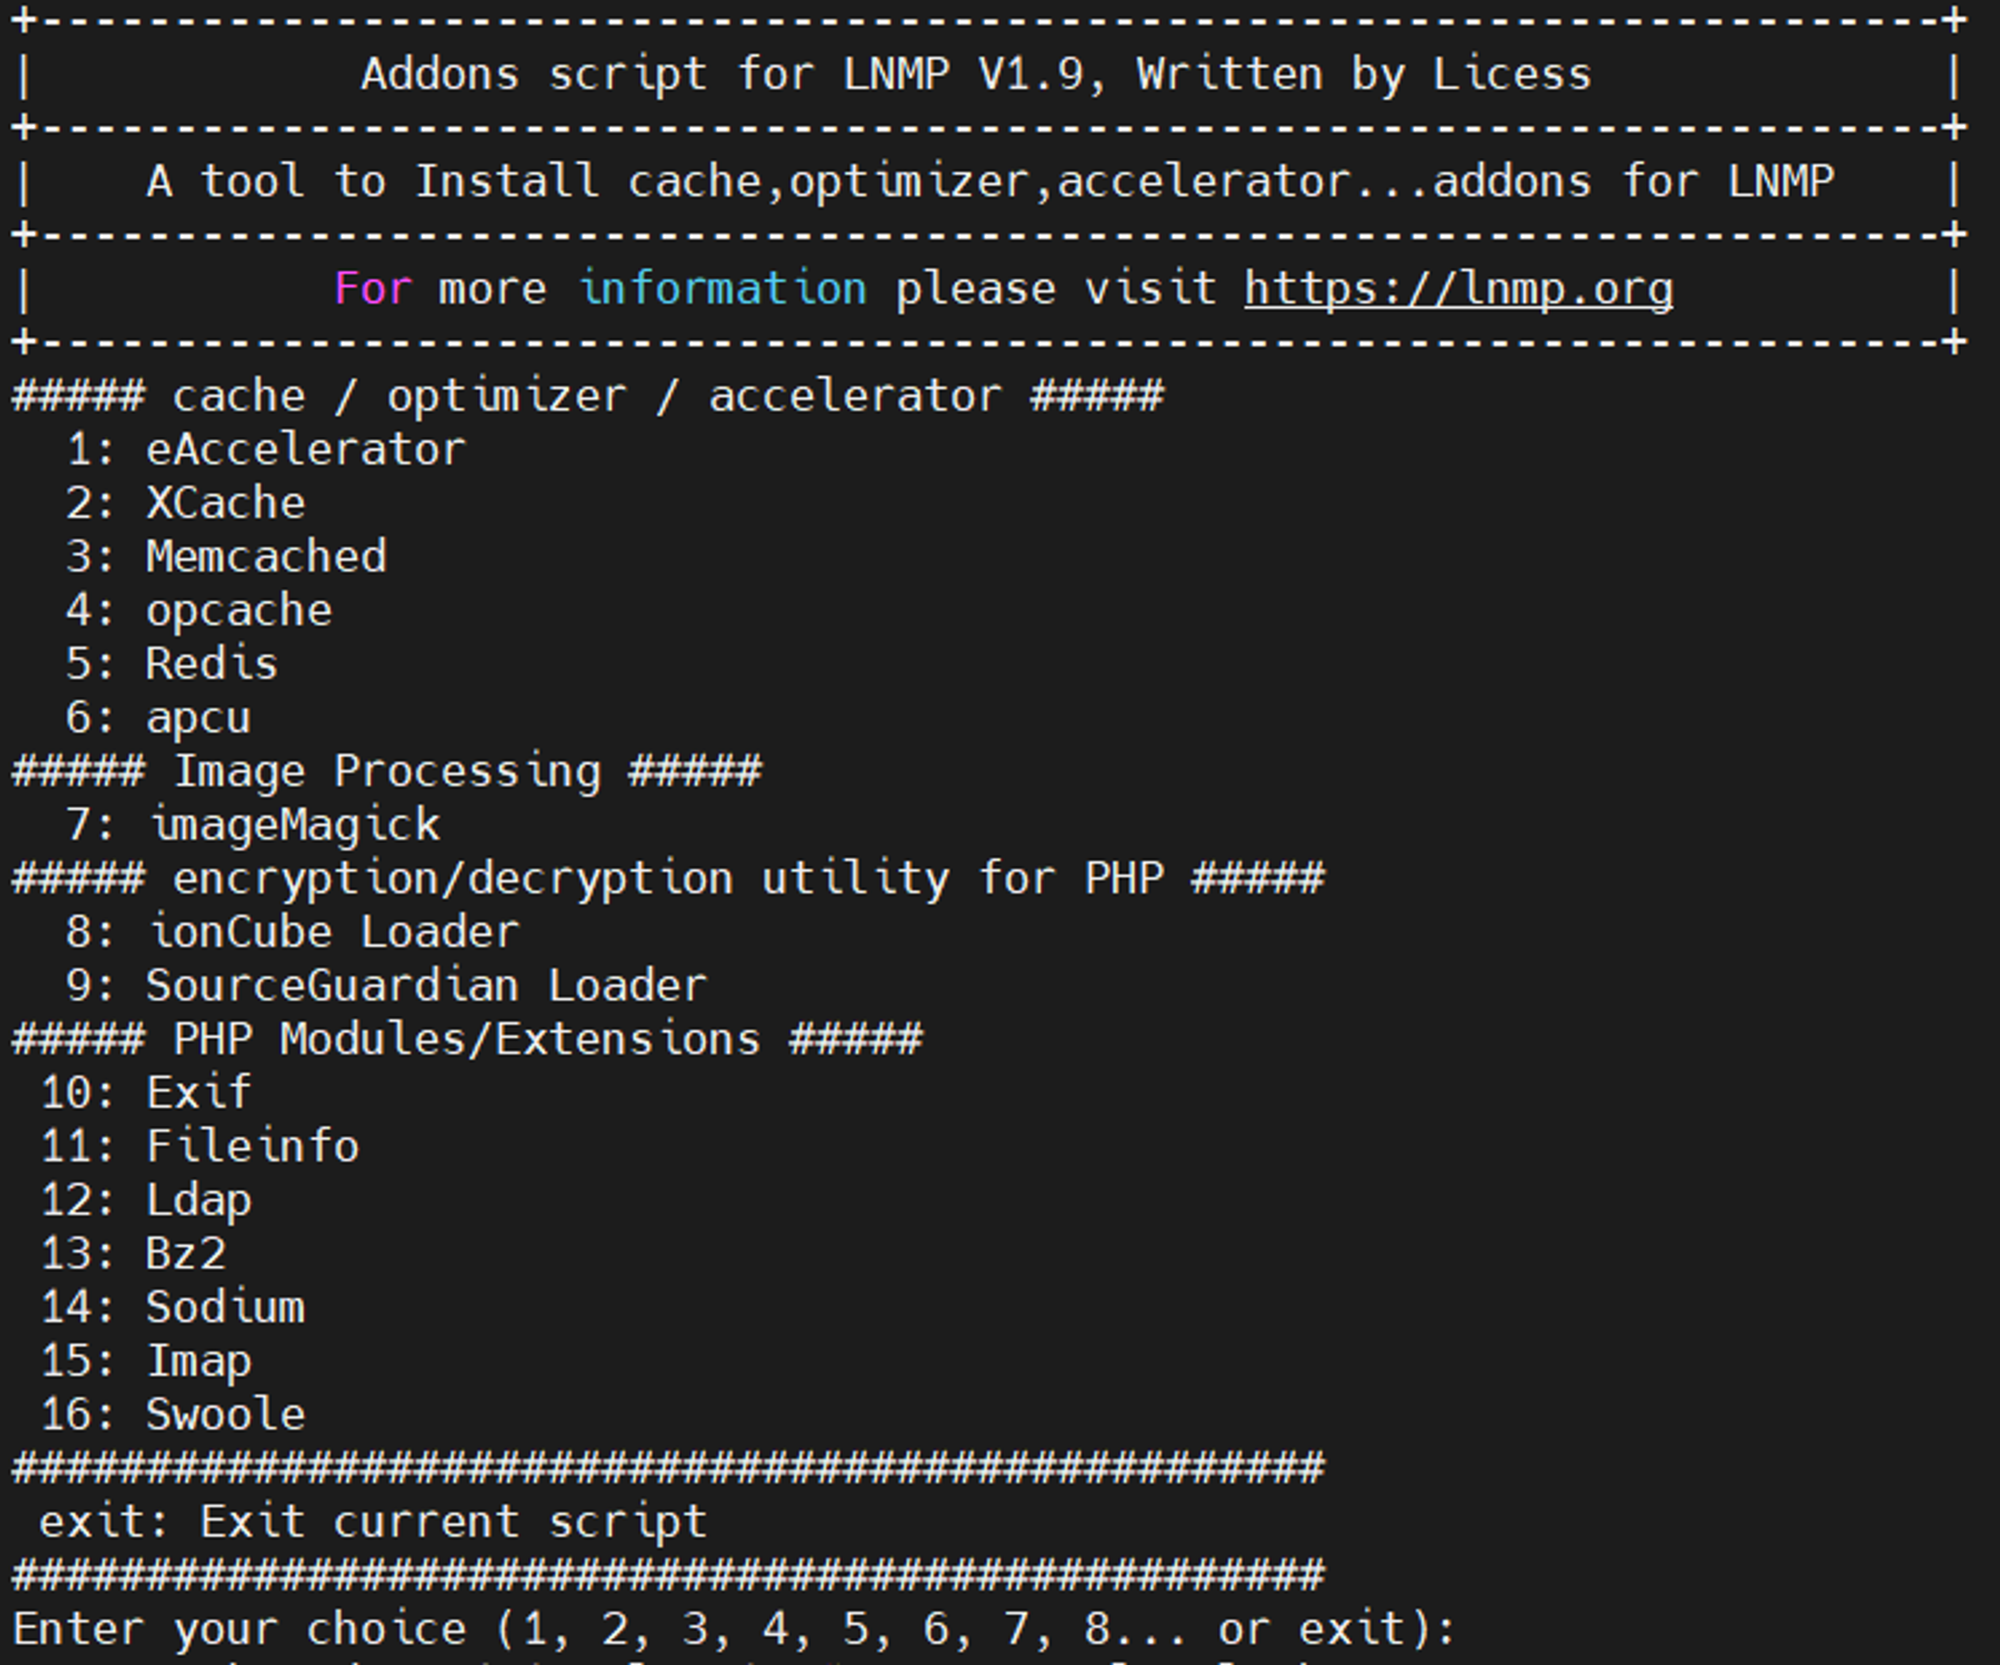
/root/lnmp1.9,运行:./addons.sh选择11

安装 PHP 其他模块
- LNMP.org 最新版在主文件夹下运行
./addon.sh按选项即可安装
- 其版本:大部分php扩展/模块的源码编译安装就是三个步骤,在源码目录下执行:
cd lnmp1.9/ext/

/usr/local/php/bin/phpize

./configure --with-php-config=/usr/local/php/bin/php-config

make && make install

make clean
有些模块可能会稍微有差异(如要求添加一些参数),具体看模块的安装文档就可以。
HTTP 500 错误 / No input file specified (PHP error log)
出现以上错误,需要检查是否完成 删除防跨目录设置 和 解除 PHP 禁用函数 步骤。否则启用 PHP 报错检查,方式如下:
在
/usr/local/php/etc/php-fpm.conf 里,加上 catch_workers_output = yes ,错误信息就会记录到 /usr/local/php/var/log/php-fpm.log 文件里。获取错误信息,方便更好的搜索解决办法。
设置 RSS 自动刷新
- 创建定时任务:
vim /etc/cron.d/FreshRSS,填入(二选其一)
0 */6 * * * root sudo -u www php /home/wwwroot/freshrss.dsuper.xyz/app/actualize_script.php > /tmp/FreshRSS.log 2>&1
0 */6 * * * php /home/wwwroot/freshrss.dsuper.xyz/app/actualize_script.php > /tmp/FreshRSS.log 2>&1
0 */6 * * * 为 cron 表达,6 表示 6h 刷新一次,可以设置为 1 (1h刷新一次)。- 设置定时任务,FreshRSS 会定期自动刷新订阅。
crontab /etc/cron.d/FreshRSS
结语
使用 lnmp.org 脚本配置环境十分便利,论坛支持强,资源占用少,十分推荐使用。总的来说:
- FreshRSS 安装的要点:
- 删除 lnmp 的防跨目录设置;
- 增加 nginx 的 location 设置;
- 取消 php 禁用的函数
openlog和syslog; - 补充缺少的 php 模块。
- 重要的技能经验:
- 开启 PHP error log,可以帮助解决安装问题。
- 防跨目录设置方面:
- 我还不是很懂……
- 特别感谢 Hikami 写的博客,和VPS侦探论坛。
推荐阅读
- [Debian]LNMP 环境下安装和配置 FreshRSS 教程: https://hikami.moe/master/program/2954.html
- 用LNMP安装FreshRSS: https://blog.nicky1605.com/install-lnmp-for-freshrss.html
- FreshRSS 项目: https://github.com/FreshRSS/FreshRSS
- freshrss 安装在 lnmp 环境出错: https://bbs.vpser.net/thread-26470-1-1.html
- LNMP模式下如何开启PHP错误日志?访问网站提示500错误如何解决?: https://lnmp.org/faq.html
- General Installation Instructions: https://freshrss.github.io/FreshRSS/en/admins/03_Installation.html
有关 FreshRSS 安装或者使用上的问题,欢迎您在底部评论区留言,一起交流~
- Twikoo
- Waline
- Cusdis